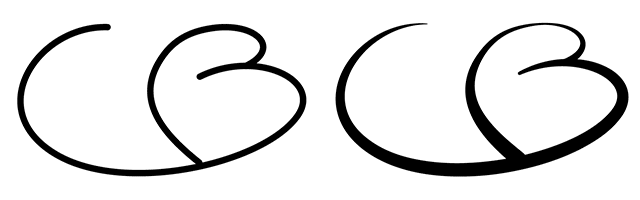
I’m not sure whether to be filled with hope or unease when I find out a feature I consider to be pretty essential has just shown up in a recent version of my 26-year-old software, but that’s the case with Adobe Illustrator and variable-width strokes, the ability to make the stroke of a path vary in width. I guess I should just count my blessings, because it’s an essential tool for creating cool-looking graphics, and was an integral part of making the [lightbox link=”http://www.tonylatorre.com/site/wp-content/uploads/2013/06/CBM-logo_640x300.gif”]logo[/lightbox] for CBM that I described last week. Just take a look at the difference between what you see below on the left and the image on the right.
The Old Way
Of course, before CS5 this was possible, but to do it you’d have to add your stroke and then expand it (Object Menu -> Expand Appearance). Now you have shapes rather than a stroked outline, and you could expand or contract that shape in places by moving your bezier points.
To the left you can already see some of the problems from doing it this way. Take a look at the top of the C from the [lightbox link=”http://www.tonylatorre.com/site/wp-content/uploads/2013/06/CBM-logo_640x300.gif”]CBM logo[/lightbox] (by the way, I’m using Illustrator CS6 with Mac OS X Lion). I wanted it to come to a point so I dragged the top and bottom points closer together but what I got instead was some kind of nub/ball thing. To make it come to a point I’d have to zoom in really close and break the bezier handles on the end point with the convert anchor point tool to get a corner point. Then I’d have to drag the top and bottom points even closer together. You basically have to go through extra work any time you want the path to be zero width. A lot of hassle for something that should be a lot simpler to do.
Now take a look at the bottom of the C. When I expanded the stroke the bezier handles for the inside and the outside didn’t line up in the same place. So making the bottom wider runs the risk of having the stroke be uneven in a way you didn’t intend. In other words, doing it the old way takes a lot longer and you get worse results.
The New Way
Variable-width strokes is a better way to do it:
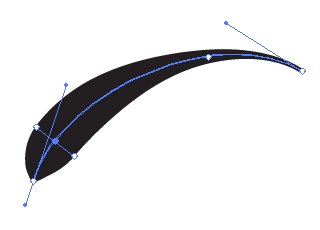
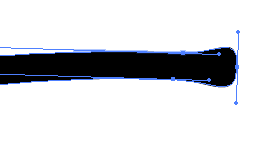
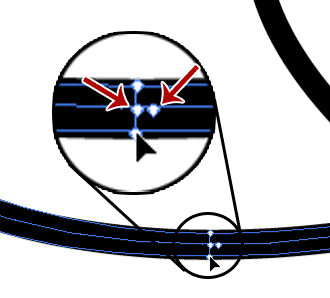
Start by making a path, and then give it a stroke. Select the width tool (shift w) and hover over your line until you see a dot appear, then click and drag as wide as you need. Unfortunately, when I would drag out the bar didn’t go exactly where I dragged all the time (see screen shot), but it was close enough for my purposes. Note that I haven’t added a new anchor point, just a width point. The two are totally different and don’t affect each other.
You can also affect just one side of the width if you want, just hold down the option (alt) key when you drag one of the end handles.

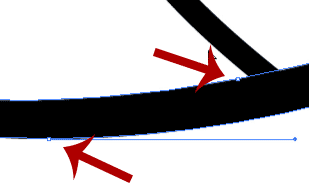
To delete a width point select the point and press delete. This can be tougher than expected, as I had to click on the point a few time before it finally took. You’ll know it’s selected when it changes from hollow (white) to your layer color (in my case, blue). Just click when the width crossbar appears, even if the cursor is near, but not over the point.
If you need to enter exact dimensions for each side or for total width, you can do that too. Just double-click on the point and it will bring up a dialog box where you can enter numeric values. You can enter in either side or total width. Selecting “Adjust Adjoining Width Points” means neighboring width points will be affected as well.

A nice touch: if your two sides are different amounts and you change total width, Illustrator will keep the same proportion (that is, the same ratio) between the two values.
And you can have width points on top of other width points to create a hard transition in stroke width (like between the arrow point and stem of an arrow. Check this writeup by Tiny Tutorials for more information.
The stroke you make with the variable width tool actually creates a stroke profile which you can see at the bottom of the Strokes panel, and which can be saved and applied to other stroked paths if you wish. In this way a variable stroke is similar to a brush that you might apply to a path. The act of creating a variable path is a lot like creating a custom brush with variable width.
Finally, holding down the shift key when moving a width point will move all width points on your path along with it.
In Conclusion
This is a well-thought out new feature and much needed. The only thing I would add is the ability to affect the interpolation between neighboring points, that is, how quickly one point changes to become the width of the next one, in much the same way After Effects lets you change the interpolation between neighboring keyframes. Right now it seems to be some kind of ease-in/ease-out, but there are time I’d like it to be linear, or an extreme ease-in, etc. It may have been 26 years in the making, but variable width strokes are worth the wait.
Update:
If you’re going to use variable width strokes often then I highly recommend getting the Illustrator plugin WidthScribe from Astute Graphics (currently about $50 USD). As good a job as Adobe has done in birthing this feature Astute has done them one better in taking variable width strokes to a whole other level. You can read more in my review of WidthScribe here.