Continuing on from last week’s investigation of Illustrator plugins from Astute Graphics, today I’m looking at WidthScribe. WidthScribe is an enhancement to the variable width stroke technology that was introduced in Illustrator CS5, and that I wrote about a few weeks ago. While variable width strokes were a big leap forward and I think in general Adobe did a good job of implementing it, there were some things that needed improvement. For example:
- Width markers can’t be marquee selected and as I showed in my post a few weeks ago, there’s a bug whereby sometimes you have to be off the marker (not touching the dot) in order to select it, which makes selecting a hit-and-miss affair.
- If you want to delete markers you have to do that one-by-one, either by double-clicking each to bring up a dialog box and then hitting the delete button, or by selecting each and hitting the delete key.
- If many paths need a similar variable stroke treatment, you still have to affect them individually, wasting valuable time.
Enter WidthScribe from Astute Graphics. WidthScribe was created to solve all these problems and more. It’s made up of four tools accessible by buttons in the toolbar and two via the Object menu. Let’s take a look at the buttons first. By the way, I was using WidthScribe in Illustrator CS6 on a Macintosh running Mac OS Lion:
Width Selector Tool
The Width Selector Tool is, as you might guess, meant to select width markers, but it does a whole lot more.
Before I get to that, however, if you want the Width Selector tool to behave like any other tool in Illustrator, go into the Width Selector Preferences (double-click the tool or hit enter if the tool is already selected) and turn on “Show Markers on Selected Paths Only”. This makes it so you’ll see the width markers only for paths you’ve selected, the way you would normally expect. Otherwise you’ll see markers for sublayers that are visible but unselected (not so bad), but also sublayers that are invisible (really confusing). When I selected this tool in a file where I had lots of layers and sublayers turned off a bewildering morass of width markers appeared; spare yourself the chaos and turn this option on.
To select markers from this tool you can either click on them or marquee drag around them. Hold down option to deselect. And thank goodness for the marquee drag tool, it will save you many-a-headache. I wish Illustrator had it but its appearance here is most welcome; I’m glad they put it in.
You can easily select all markers on a path where you have at least one selected, and you can delete all selected markers with just a click of the garbage button.
Despite being called the Width Selector tool though, you can also use this tool to make changes to the markers.
- You can taper markers, which bring down the width of the end of a path.
- You can average markers, which gives all selected markers the same width.
- You can smooth markers, which seems to work like average only more subtly.
- You can specify an exact width for any selected markers.
- You can increase or decrease the width of markers by a percentage you set.
Using this same tool you can shift the stroke from side to side, meaning you can use it to take width from 1 side of a width marker and add it to the other.
Another benefit of the Width Selector Tool over the native Illustrator tools is that width markers are actually easier to view. In Illustrator you can’t see the width markers unless you rollover the path or have one selected already. In WidthScribe you can see the markers as long as you’re in the Width Selector tool, and if “Show Markers on Selected Paths Only” is turned on your element will also need to be selected. I also much prefer WidthScribe’s bow tie to Illustrator’s dot in representing markers.
Width Gradient Tool
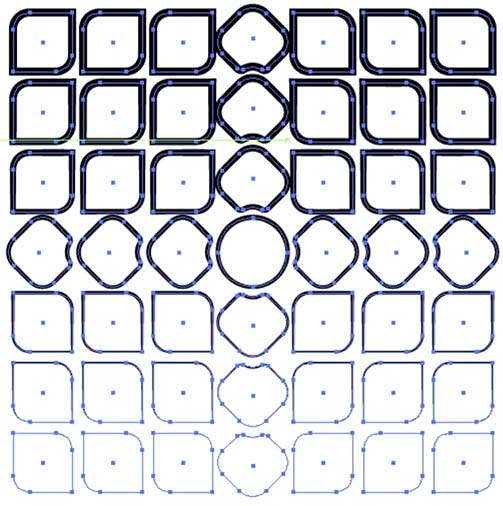
The Width Gradient Tool is great for when you have a bunch of paths but whose variable stroke width are all somehow related, like the eyelashes of an eye or a grid of boxes where the stroke is supposed to get thicker, say, from bottom to top.
First, select whether you want a linear or radial gradient. Next, select whether you want the gradient to be absolute or relative. If you want your line widths to go from a specific point value to another specific point value, that’s absolute. If you want your line widths to go up or down a certain percentage to another percentage from whatever the current line widths are, that’s relative. Relative gradients are cumulative; they take your existing stroke widths and change them. Absolute gradients don’t care what your stroke widths happen to be, they erase them completely and add their own.
But the best part of the Width Gradient tool is the Curves-like graph in the middle of the panel. Here you can set 2 values and tell WidthScribe how your gradient goes between them. And just like Curves in PhotoShop, you can create just about any kind of path you want. Check the pullout menu for examples, starting with the options listed under “Default”.
If you’ve set the gradient to be absolute, the top and bottom values will be line widths; if relative, they’ll be percentages.
One last thing to keep in mind with this tool is the Width Optimization bar. This sets how many width markers it will use. Moving the slider all the way to the left (optimization=0) means it will add a lot of markers but be more accurate to your curve. All the way to the right (optimization=10) means it will use as few as possible but accuracy may be compromised.
Width Brush Tool
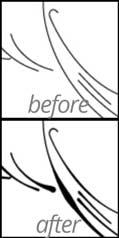
The Width Brush Tool is the best tool for instant gratification; select it, start painting and instantly see your artwork improve.
Unlike the previous tools this one has no panel of settings so the Options dialog is important here (double-click the tool or hit enter if you’re already in it). The brush has width and hardness settings just like in PhotoShop (also like in PhotoShop, the brush size can be set with the [ and ] keys.) Adjust widths by percentage sets how much each brush stroke will increase or decrease. Post-processing optimization works the same way as in the Width Gradient Tool.
Note: holding down the shift key when painting reverses the action of the brush. In other words, if you had your brush set to increase the stroke by 20%, holding shift will decrease it by that amount instead.
Width Eraser Tool
The width eraser tool is not the inverse of the Width Brush Tool. Rather, it lets you erase your width markers by just brushing over them, a big timesaver over Illustrator’s selecting each individually. But like the Width Brush Tool, you can increase or decrease brush size with the [ and ] keys.
Note: when in the Width Brush Tool holding down option is a quick way into the Width Eraser tool. It won’t let you change brush size this way but otherwise acts the same.
Vary Width Markers
Vary Width Markers is one of the two tools that doesn’t have a button. Instead, it is accessed by going to Object Menu:Path:Vary Width Markers…, and is great if you want to add some width randomness to your path. The main parameters to remember are:
The Spacing value will set down width markers that value apart for the whole length of your path.
Your widths will be randomly distributed between the Minimum and Maximum Variation values. Min variation goes from 0% to 100% and Max variation goes from 100% to 1000%.
Optimise Width Markers
Right next to Vary Width Markers is Optimise Width Markers (they use the British spelling of Optimise, so I will to), at Object Menu:Path:Optimise Width Markers…. This works the same as the Optimise bar in Width Gradient and Width Brush, but as a reminder allow me to quote myself:
Moving the slider all the way to the left (optimization=0) means it will add a lot of markers but be more accurate to your curve. All the way to the right (optimization=10) means it will use as few as possible but accuracy may be compromised.
Optimization happens to the whole path rather than only to any markers that might be selected. Be careful with this tool as the cancel button doesn’t seem to work, click it and it applies the optimization anyway.
So that’s what WidthScribe CAN do. What can’t it do? It can’t change the width of width markers by dragging; you also can’t drag them to another location. For that you must go back to Illustrator’s Width Tool.
In short, here’s why you would want WidthScribe:
- The biggest reason, and where it really excels, is in changing multiple width markers at once, to enlarge or shrink widths over multiple paths, or if you have a set pattern you want to change them by
- to add many width markers quickly over the length of a path
- to intelligently remove width markers in width marker-heavy artwork
- to quickly delete many markers at once
Adobe, with Illustrator CS5, added a great feature in variable width strokes. Astute Graphics has enhanced it even further. In the future I would love to see the two work together, as selecting markers in WidthScribe doesn’t keep the selection when you switch over to the Width Tool. But overall, this takes what was a pretty good tool set and makes it even better; it adds the cherry on top.
Other Posts in This Series: